Learn how to create a checklist that organizes your workflow, automates tasks, and cuts through the chaos. A practical guide for busy professionals.
March 21, 2026 (3mo ago)
How to Create a Checklist That Actually Boosts Your Productivity
Learn how to create a checklist that organizes your workflow, automates tasks, and cuts through the chaos. A practical guide for busy professionals.
← Back to blog
Before you can build a great checklist, you have to understand why they work so well. The first step is always to get your process out of your head and onto a structured list. This one simple action is a game-changer—it immediately cuts down your cognitive load and helps you sidestep decision fatigue.
Suddenly, you have a clear path forward, which frees up your mental energy for the work that actually matters.
Why Your Brain Loves a Good Checklist
There's no denying the satisfaction that comes from ticking off a task. But the real magic of a checklist goes much deeper than a quick dopamine rush. Our brains are constantly swimming in a sea of information, and they naturally seek out structure to make sense of it all. A well-built checklist is the perfect tool for bringing order to that chaos.

Think of your checklist as an external hard drive for your brain. Instead of trying to juggle every single step of a project in your head, you're offloading that entire sequence to a system you can trust. I’ve seen this have a powerful effect on people for a few key reasons:
- It fights decision fatigue. When you've already defined the steps, you're not burning mental cycles figuring out what to do next.
- It shows tangible progress. Each checked item is a small win, building momentum that keeps you motivated through long projects.
- It frees up your working memory. With your mind clear of tracking tasks, you can fully focus on execution and creative problem-solving. We actually have a great guide on working memory improvement strategies if you want to dig deeper into that.
The Power of Structured Thinking
This isn't just a productivity hack; it's a proven cognitive tool. The approach is so effective that it's even used in clinical settings, where mental health professionals use structured questionnaires or checklists to assess complex conditions. By breaking down a big, intimidating goal into smaller, manageable pieces, you make it instantly more approachable.
For anyone managing projects, this method is a must. Implementing checklists has been shown to slash errors by as much as 70% in complex workflows by ensuring nothing falls through the cracks.
The demand for these tools is exploding for a reason. The global task management software market is expected to jump from $1,713 million in 2018 to a staggering $4,535.5 million by 2026. This isn't just a trend; it's a direct response to professionals drowning in their workloads.
Without a structured list, the average worker can lose up to 2.1 hours every day just looking for information or trying to figure out what their next step should be.
Ultimately, creating a checklist is about giving yourself the gift of clarity. It's your best defense against the chaos of a busy workday and the secret weapon for turning ambition into tangible results.
Building Your First Reusable Checklist Template
Alright, let's get our hands dirty. It's time to graduate from scattered sticky notes and build a real, dynamic asset in Fluidwave. We're not just making a single checklist; we're crafting a master template you can pull out and use instantly, saving you from that "what did I forget?" feeling every time you start a new project.
We'll use a common, high-stakes process as our guinea pig: New Client Onboarding. This is the perfect example. It's a multi-step dance that needs to be flawless every time because it sets the entire tone for your new relationship.
From Vague Goal to Concrete Actions
So, where do you start? The most common mistake is creating a checklist item that says "Onboard new client." That's a goal, not an action. It's too big, too vague, and leaves way too much room for things to fall through the cracks.
Instead, you have to break that big goal down into small, non-negotiable tasks. What actually needs to happen to onboard a client correctly?
- Send the welcome packet and contract
- Receive the signed contract and initial payment
- Schedule the kickoff call
- Grant the client access to their project portal
- Send the initial discovery questionnaire
- Hold an internal team briefing on the client's goals
See the difference? Each of these is a clear, actionable step. It’s either done or it’s not—no gray area. This clarity is the foundation of any template that actually works. As you build your own, it can be helpful to see how others structure similar processes. Looking at various onboarding checklist templates can spark some great ideas for your specific industry.
Bringing Your Checklist to Life with Custom Fields
A simple list of tasks is a good start, but the real power comes when you add layers of information. This is where Fluidwave's custom fields turn a static list into a living, breathing workflow. For our client onboarding template, let's add a few fields that give each task context and accountability.
Here's how that might look as you start building it out in Fluidwave.
The image above shows a clean interface where you can easily drop in fields for assignees, deadlines, and status, turning a basic list into an interactive tool.
By adding these simple fields, you’ve just created a command center for your onboarding process. Now, at a glance, you can see exactly who is doing what, when it's due, and how far along they are. No more chasing people for updates.
Pro Tip: Your first draft of a template will never be perfect. I guarantee it. Think of it as a living document. After you run a few clients through the process, you'll immediately see steps you missed or ways to be more efficient. Don't be afraid to go back and refine it.
For a more detailed walkthrough of the nuts and bolts, our complete guide on how to make a template in Fluidwave is a great next step. Getting this right is a small investment of time upfront that will give you back countless hours and a whole lot of peace of mind.
Choosing the Right Visualization for Your Workflow
So, you’ve built your checklist template. That’s the hard part, right? Not quite. A common mistake I see people make is focusing entirely on the what—the tasks themselves—while completely overlooking the how. How you view and interact with that checklist can make the difference between a process that flows and one that just feels like more work.
The truth is, a checklist is only as good as its presentation. In Fluidwave, you're not locked into one way of seeing things. You have options—List, Table, Kanban, and Calendar—and mastering them is what separates the casual list-maker from the truly organized pro. It’s all about matching the view to the job.
This diagram illustrates the core philosophy behind building any effective checklist, starting from the big picture and drilling down into the details.
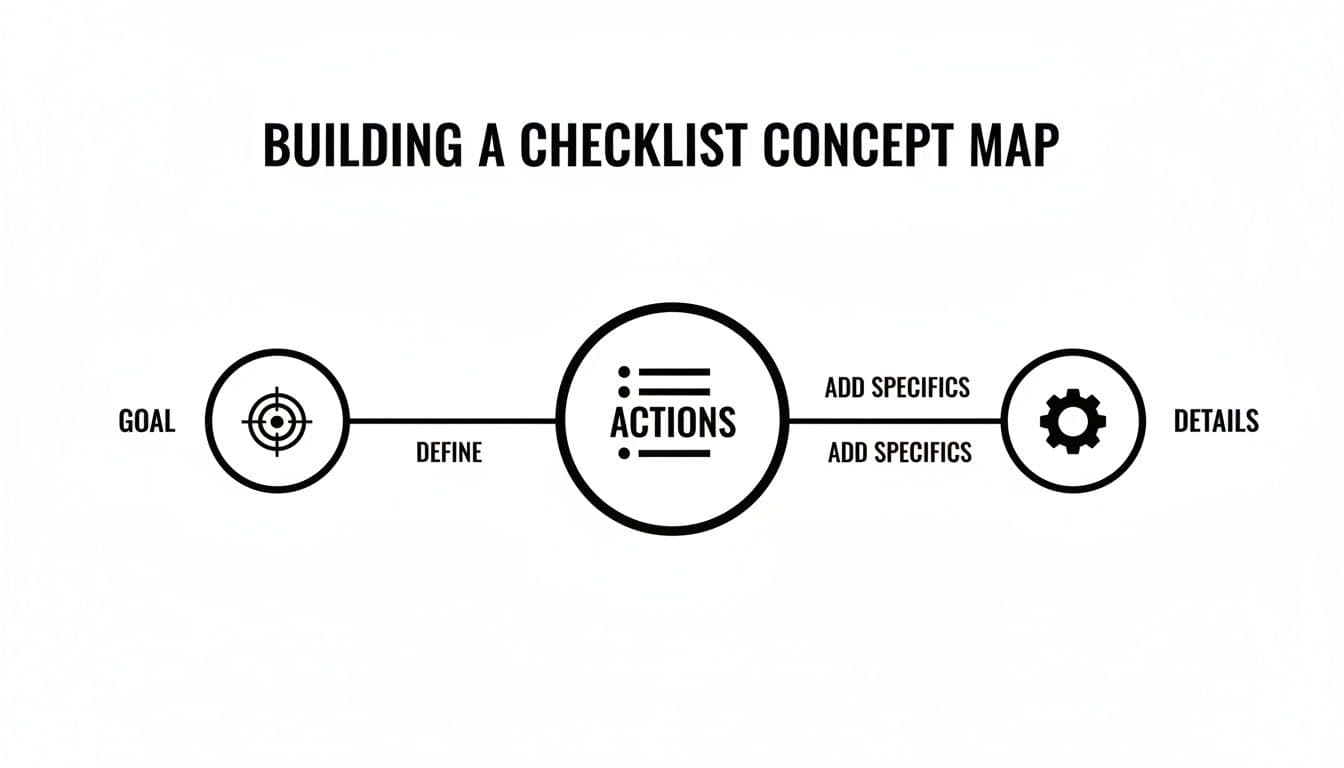
The map shows a simple but powerful truth: every great checklist begins with a clear goal, is broken down into concrete actions, and is supported by specific details. Now, let's explore how Fluidwave's different views help you manage those actions.
Finding the Perfect View for Your Project
Your project's needs should dictate the view you choose. A simple List view, for example, is perfect for straightforward personal tasks—groceries, errands, quick reminders. It’s clean, it’s direct, and it delivers that simple satisfaction of checking things off. There’s no need to over-engineer it.
A Table view, on the other hand, comes into its own when you’re dealing with data-heavy projects. Imagine you’re managing client contacts or comparing vendor quotes. You need to see and sort multiple data points side-by-side—price, delivery date, status. A table organizes this dense information beautifully, making it easy to compare details at a glance.
For many teams, the biggest shift happens when they adopt a Kanban board. There's a unique power in seeing tasks physically move from 'To Do' to 'In Progress' and finally 'Done.' It creates an immediate, shared understanding of momentum that a static list just can't match.
Deciding which view to use can feel overwhelming, so I’ve put together this quick comparison to help you choose the right one for your specific needs.
Matching Your Fluidwave View to Your Task
| View Type | Best For | Key Benefit |
|---|---|---|
| List View | Simple, linear tasks; personal to-do lists; brain dumps. | Ultimate simplicity. Fast, clear, and focused on getting things done without distractions. |
| Table View | Data-rich projects; tracking budgets; managing inventory or contacts. | Information density. Lets you sort, filter, and compare multiple custom fields at once. |
| Kanban View | Projects with distinct stages; team collaboration; agile workflows. | Visual progress tracking. Instantly shows where every task is in the workflow and identifies bottlenecks. |
| Calendar View | Deadline-driven work; content schedules; event planning. | Time-based planning. Visually maps tasks to specific dates, helping you manage capacity and deadlines. |
As you can see, each view offers a different lens through which to see your work. The key is to experiment and find the one that makes your specific process feel the most natural and intuitive.
Real-World Scenarios in Action
Let’s put this into practice. A marketing team launching a new ad campaign would get huge value from a Kanban board. They can create cards for tasks like "Write Ad Copy," "Design Visuals," and "Launch on Social Media." As the campaign moves forward, everyone on the team can see tasks flow across the board, providing instant clarity on progress without a single status meeting.
Conversely, a freelance writer juggling multiple client projects would find a Calendar view indispensable. By plotting deadlines for articles, revisions, and pitches directly onto the calendar, they can manage their weekly capacity, avoid overbooking, and make sure they never miss a critical delivery date.
Getting comfortable with these different perspectives is what makes a workflow feel truly effortless. For a deeper look, check out our guide on essential workflow visualization tools. Remember, choosing the right view isn't just about aesthetics—it's a strategic decision that makes your checklists more actionable and your entire process more intuitive.
Automating and Delegating Your Checklist Tasks
Once you've built a solid checklist template and decided how you want to view it, you can start making it work for you. This is the real game-changer. It’s where you graduate from just managing tasks to actually building a system that runs itself, freeing you up for the work that matters most. With Fluidwave’s automation and delegation features, you can reclaim your time without letting things slip through the cracks.

The word "automation" can sound intimidating, but in Fluidwave, it's really just about setting up simple "if this, then that" rules. Think about a blog post checklist. Instead of you having to poke your editor every time a draft is ready, you can create a rule that does it for you. As soon as you mark "Write First Draft" as complete, the "Proofread Article" task can automatically land on their plate. No extra messages, no follow-up emails—just work flowing smoothly from one stage to the next.
Putting Your Checklists on Autopilot
I've found that automation really shines in those recurring, predictable workflows. You don't need to be a coder. It’s about spotting the manual handoffs you do every day and letting the system take over.
Here are a few simple but powerful rules you can set up right away:
- Trigger-Based Assignments: When a new lead hits your CRM, have Fluidwave instantly generate your "New Lead Follow-Up" checklist and assign it to someone on the sales team.
- Status Change Notifications: The moment a task's status is changed to "Blocked," an instant notification can be sent to the project lead. This lets them jump in immediately, not hours later.
- Deadline Reminders: Set a rule to automatically ping the task owner 24 hours before a deadline. It's a simple nudge that prevents so many things from becoming urgent fires.
These little automations add up. They cut down on the mental energy you spend just keeping track of everything. You stop being the bottleneck and become the designer of an efficient process.
The Art of Delegating Tasks to Virtual Assistants
Some tasks don’t just need a new owner—they need to get done by someone else entirely. This is where you can lean on Fluidwave's network of pay-per-task virtual assistants. It's the perfect way to offload specific, well-defined items from your checklist so you can stay focused on strategy.
But let's be honest, effective delegation is a skill. Just assigning a task like "Research competitors" is a recipe for disappointment. You have to be incredibly clear.
A well-defined request is the key to a successful outcome. For a pay-per-task job, your instructions should be so clear that there's zero ambiguity about what "done" looks like.
For instance, instead of that vague request, you’d structure the task with this level of detail:
Task: Research Top 3 Competitor Pricing Models Deliverable: A Google Sheet with three tabs, one for each competitor (Competitor A, Competitor B, Competitor C). Instructions:
- For each competitor, list all public-facing pricing tiers.
- For each tier, document the monthly price, annual price, and key features included.
- Add a column for any limitations mentioned (e.g., user caps, storage limits).
- Include a direct link to their pricing page.
See the difference? This level of detail ensures you get exactly what you need without a frustrating back-and-forth.
This combination of smart automation and clear delegation is a major reason why the task management market, valued at USD 6.8 billion in 2024, is on track to hit USD 13.6 billion by 2030. In today’s hybrid work world, these capabilities are no longer just nice extras; they are absolutely essential for staying productive. If you're interested, you can discover more insights about the trends in task management software.
Advanced Checklist Strategies for Power Users
Once you get the hang of basic checklists, the real fun begins. This is where you graduate from simple to-do lists to building a genuine command center for your projects and your team. You stop just tracking tasks and start orchestrating complex work with incredible clarity.
For instance, I stopped using flat lists for multi-phase projects a long time ago. Now, I build nested checklists in Fluidwave. The main parent checklist might be something broad like "Q3 Product Launch." Tucked neatly inside are separate, detailed checklists for "Phase 1: Market Research," "Phase 2: Development Sprints," and "Phase 3: Go-to-Market." This gives you a clean, high-level view while letting your teams get into the nitty-gritty of their specific tasks.
Building Your Custom Command Center
As a project scales, a single, sprawling list quickly becomes more of a burden than a help. The real power move is using tags and filters to create custom views that show you exactly what you need to see, right when you need to see it.
Think of tags as simple, powerful labels you can attach to any task. I use them for everything, and I recommend you start with a few key categories:
- Urgency: #urgent, #high-priority, #backlog
- Team: #marketing, #dev, #legal-review
- Client: #client-A, #client-B
- Task Type: #research, #writing, #design
Once you have these tags in place, you can slice and dice your workspace instantly. Need to see all #urgent tasks assigned to the #marketing team this week? One click, and that's your entire view. This is how you cut through the noise and focus.
Making Collaboration Actually Work
Let's be honest: endless email chains about project updates are where productivity goes to die. A shared checklist in Fluidwave pulls all that communication directly into the work itself. You can have entire conversations right on a specific task card, which keeps feedback, files, and decisions exactly where they belong—not buried in someone's inbox.
This is also a game-changer for client work. I often create and share a specific "Project Milestones" checklist with a client to give them a real-time, transparent view of our progress. At the same time, my internal team works from a separate, more detailed checklist with our own private notes, discussions, and nitty-gritty tasks. The client sees progress, and we maintain our internal workflow.
The goal is to make your checklist the single source of truth. When everyone knows exactly where to look for updates and what their next step is, you slash miscommunication and wasted time. You're not just tracking tasks; you're building momentum.
This shift toward smarter, collaborative work is why the task management market is on track to hit USD 9.97 billion by 2032. The results for teams are clear: 76% of those using digital checklists report far better progress tracking, which helps them cut project overruns by an average of 28%. That's a direct counter to the estimated 21% of the workday professionals lose just from poorly planned work. You can dig into the data behind these figures in this task management software research.
Supporting Neurodivergent Users
For many of my neurodivergent colleagues and clients, the clean interface and visual structure of a tool like Fluidwave are more than just a nice-to-have—they're essential for staying focused. The ability to switch between a simple List view on a low-distraction day and a visual Kanban board to see workflow is incredibly helpful.
By creating a clear, predictable system with nested lists and clear tags, you lower the cognitive load it takes to figure out "what's next?" This frees up mental energy for deep, focused work, turning a checklist from a source of potential overwhelm into a genuine tool of empowerment.
Common Questions About Creating Effective Checklists
As you start building a real checklist system, a few questions always seem to pop up. I've heard them from countless professionals moving from messy to-do lists to repeatable processes, so let's clear up some of the most common sticking points.
How Detailed Should My Checklist Items Be?
This is where people often get tripped up. The goal is to find that sweet spot—not too vague, not too microscopic. Each item should be a single, concrete action you can knock out in one sitting.
A classic mistake is a task like "Write blog post." That's not a task; it's a project. It's so big that you'll just stare at it and procrastinate.
Instead, that one item should become several smaller, actionable steps:
- Research keywords for the topic
- Create a detailed outline with H2s and H3s
- Write the first draft of the body content
- Find and optimize images
The idea is to remove all friction. When you glance at an item, you should know exactly what to do and be able to start immediately without a fresh round of decision-making.
What Is the Best Way to Use Checklists for Team Projects?
For teams, shared checklists are an absolute game-changer. When done right, a team checklist ends the constant back-and-forth and the dreaded "who's doing what?" confusion. It becomes the central hub for the project.
In a tool like Fluidwave, this is simple. You can build a master checklist for the project, map out every step, and then assign individual items to your team members with clear due dates. Everyone sees the whole process, which builds a natural sense of ownership and accountability.
How Do I Avoid Getting Overwhelmed by a Long Checklist?
It's a great question because checklist overwhelm is very real. A list with 50 items can feel more paralyzing than productive. The trick is to ruthlessly filter your view so you only see what matters right now.
A long checklist isn't a problem if you have the right tools to manage it. Use priority flags, date filters, or assignee filters to narrow your focus to just a handful of tasks.
I find Kanban views are especially brilliant for this. It naturally forces you to concentrate only on the few tasks sitting in your "In Progress" column. If a list consistently feels too massive, that's a good sign it needs to be broken into smaller, separate checklists, maybe organized by project phase or category.
Is a Checklist the Same as a To-Do List?
They might seem similar, but they serve very different purposes. I think of a to-do list as a daily brain dump—a collection of random, often disconnected tasks you hope to get to.
A checklist, on the other hand, is a standardized, repeatable process. It's designed from the ground up to ensure quality, consistency, and to make sure nothing gets missed. Think of it this way: a to-do list is the "what," but a powerful checklist is the "how."
Ready to build a system that goes beyond basic lists to actually save you time and reduce mental clutter? Fluidwave has all the features you need—from templates and automation to simple delegation—to create checklists that truly work. Get started for free today and feel the difference.
Focus on What Matters.
Experience lightning-fast task management with AI-powered workflows. Our automation helps busy professionals save 4+ hours weekly.