Learn how to make a template in Fluidwave with this practical guide. Boost productivity, standardize workflows, and reclaim time with practical examples.
March 20, 2026 (3mo ago)
How to Make a Template for Faster Workflows
Learn how to make a template in Fluidwave with this practical guide. Boost productivity, standardize workflows, and reclaim time with practical examples.
← Back to blog
Starting a new project often feels like you're stuck on a hamster wheel, manually recreating the same task list every single time. The steps are familiar, but building them from scratch is a huge time-waster. Learning how to make a template is the solution—it's about creating a reusable blueprint for your recurring work, turning a repetitive process into a one-click action.
Stop Reinventing the Wheel with Task Templates
Every busy professional knows that nagging feeling of starting from zero. You're about to kick off a weekly report or onboard a new client, and you find yourself staring at a blank screen, trying to remember every single step, dependency, and deadline. This is exactly where templates become a secret weapon in your workflow, especially for teams using a platform like Fluidwave.
This isn't just about saving a few minutes. It's about building a predictable and scalable system for getting work done right. When you standardize a recurring process, you take the mental load out of remembering every detail and slash the risk of human error. No more forgotten steps or inconsistent results.

The Real Cost of Manual Project Setup
Think about it this way: every minute spent manually building out a project is a minute you could have spent on strategy, creative work, or just moving the needle. These small, repetitive tasks seem harmless, but they add up fast, draining both your productivity and your budget.
Here’s a quick comparison showing the immediate impact of using a task template for a recurring project.
| Metric | Manual Process (Without Template) | Templated Process (With Fluidwave) |
|---|---|---|
| Setup Time | 30-45 minutes | 2-5 minutes |
| Task Creation | Manual entry for each sub-task | All tasks pre-populated |
| Assignees/Deadlines | Assigned individually | Pre-assigned or dynamically set |
| Risk of Error | High (forgotten steps, typos) | Low (standardized, pre-vetted) |
| Consistency | Varies by project manager | Guaranteed consistency |
The difference is stark. Moving to a templated system immediately frees up time and mental energy for more important work.
A simple template transforms your workflow by creating consistency and predictability. It’s the difference between building a new car from scratch for every trip and just getting in and driving.
Automated workflows are proven to give teams back their most valuable asset: time. We've seen teams using automation in tools like Fluidwave reclaim over four hours per week. This principle is also why the website builder market, which is built on templates, is projected to hit $4.4 billion by 2033. Applying this same logic to your tasks can slash project setup time by up to 50%.
Real-World Examples of Templates in Action
Templates aren't just for massive, complex projects. They bring powerful structure and clarity to all sorts of everyday work. For example, a content team using a podcast show notes template can standardize their production process and make sure every episode is optimized for search engines.
Other common workflows that are perfect for templates include:
- Client Onboarding: A complete checklist that includes sending the welcome packet, scheduling a kickoff call, and setting up their private workspace.
- Weekly Team Meetings: A pre-built agenda with sections for wins, roadblocks, and action items, ensuring every meeting is productive.
- Content Production: A multi-stage workflow with phases for brainstorming, drafting, editing, and publishing, keeping the entire pipeline visible.
By adopting templates, you shift from reactive task management to proactive system building. You can even get a head start by checking out our guide on using a project planning template for more complex initiatives.
Designing a Template That Actually Works
We’ve all seen it happen: a well-intentioned template that creates more confusion than clarity. Instead of saving time, it adds extra steps and gets ignored by the team, eventually gathering digital dust. If you want to build a template that actually gets used, you have to think like an architect before you start laying bricks.
This process starts by moving beyond a simple to-do list and mapping out the entire workflow. Let's take a common example, like a freelancer onboarding a new client. What are the core, non-negotiable steps that happen every single time? You'll always need to send a contract, schedule a kickoff meeting, and gather the initial project assets.
These repeatable tasks form the skeleton of your template. You want to leave out the one-off variables, like a client’s specific feedback on a single draft. The goal here is to standardize the 80% of the work that’s predictable, which frees up your team to creatively handle the unique 20%.
Define Your Template's Scope and Required Fields
With the core stages identified, it’s time to get specific about the information needed to move work forward. This is where you outline the required fields, task dependencies, and realistic timelines. A vague task like "write blog post" is a classic recipe for delay because it lacks the detail needed for anyone to actually start working.
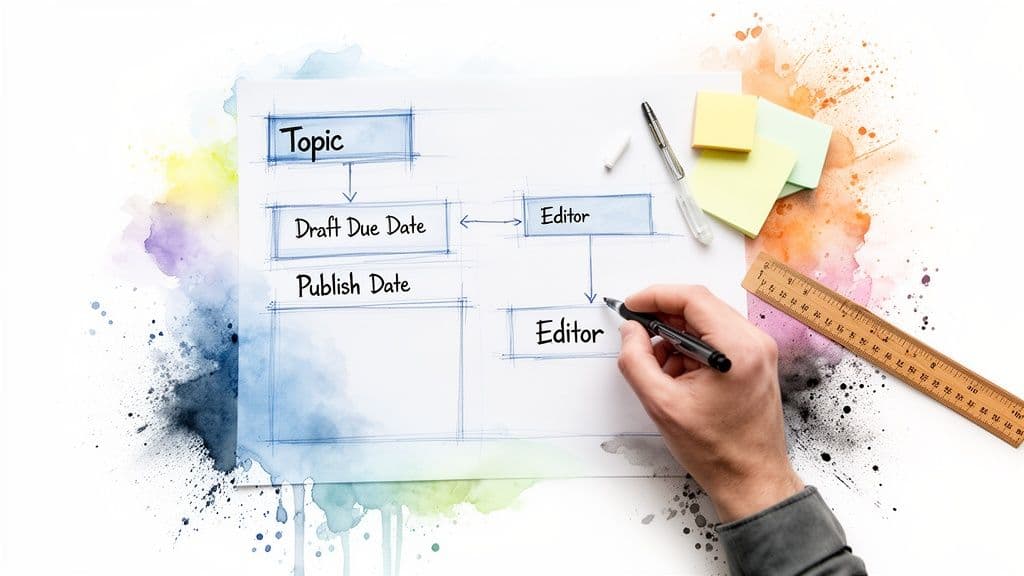
A far better approach is to break that task down with specific, non-negotiable fields. For our content production template, that might include:
- Topic: The clear subject of the article.
- Target Keyword: The primary SEO term to focus on.
- Draft Due Date: A non-negotiable deadline for the first version.
- Assigned Editor: The person responsible for the review stage.
- Publish Date: The final go-live date for scheduling.
A well-designed template anticipates needs. By defining required fields and dependencies upfront, you eliminate guesswork and ensure everyone knows exactly what's expected of them at every stage.
Thinking through these details is what separates a simple checklist from a true workflow. If you want to get better at visualizing these processes, our guide on process mapping with flowcharts is a great resource for bringing clarity to complex workflows.
Map Out Dependencies and Timelines
Finally, you need to think about how tasks relate to one another. A blog post can’t be edited until the draft is written. The design team can't create graphics until the final copy is approved. These are dependencies, and a smart template will build this logic directly into its structure.
Using a platform like Fluidwave, you can set up these relationships to make sure tasks only become active when they're ready. This is also where you build in realistic timelines. From experience, I always budget at least two business days for an editing cycle after a draft is submitted. Building these logical connections and time buffers into your template is what makes the whole process run smoothly and predictably, turning your blueprint into a reliable engine for your team.
Building Your First Template in Fluidwave
Alright, you've done the planning. Now let's get our hands dirty and build that template right inside Fluidwave. This is where your design document transforms into a living, breathing asset for your team.
The best way to start is by building out a standard project first. Think of it as your sandbox or master copy. For this walkthrough, we’ll use a classic example that every service-based business needs: a Client Onboarding workflow.
From Project to Reusable Template
First things first, create a new project in Fluidwave. I always recommend giving it a name that makes its purpose obvious, something like "Client Onboarding Master Template." This simple naming convention prevents anyone from accidentally using it for a live client.
With your project created, start dropping in the core tasks you mapped out earlier.
For our client onboarding process, that would look something like this:
- Send Welcome Packet & Contract: This is the official starting gun for any new partnership.
- Schedule Kickoff Call: The single most important meeting for setting expectations and aligning goals.
- Gather Project Assets: Your bucket for collecting all the client’s files, brand guides, and login credentials.
- Internal Team Briefing: The huddle where you get your own team ready for the work ahead.
A great template doesn't just list what to do; it creates a bulletproof sequence. It guides the user from one step to the next, making it nearly impossible to forget something crucial and guaranteeing every client gets the same polished experience.
Adding Structure with Subtasks and Dates
A list of tasks is a good start, but the real magic happens in the details. Go into each of your larger tasks and break them down into smaller, concrete subtasks. For a task like "Schedule Kickoff Call," you might add subtasks for "Send calendar invite with agenda" and "Confirm attendees." This tiny bit of extra detail removes all the guesswork for your team.
Next up is one of my favorite features for templates: relative due dates. Instead of plugging in a fixed date like "October 25th," you set deadlines based on triggers. A task can be due "7 days after project start," for example. When you use the template, Fluidwave automatically calculates all the deadlines for you. It's a massive time-saver.
Here’s a glimpse of how this starts to look inside the platform, whether you prefer a list, board, or calendar view.
The key takeaway here is that a template is much more than a checklist. It's a fully-formed project environment, complete with its own structure and dynamic timeline, ready to go at a moment's notice.
Assigning Roles and Saving Your Template
Before you save, there’s one last-minute detail that makes a world of difference: pre-assigning roles. If the lead designer always handles asset collection, assign that task to their role right in the template. Doing this upfront cuts out a ton of administrative drag on every new project you launch.
Once your tasks, dates, and roles are all set, head over to the project settings menu. You’ll find an option to "Save as Template." Give it a clear, descriptive name, hit save, and you’re done. You've just created a powerful asset that will pay back the time you invested tenfold.
Supercharge Your Templates with Smart Automations
A static template is useful, but an automated one is where the real magic happens. Once you've laid the groundwork for your template, you can bring it to life by weaving in some smart automation. This is what elevates a simple checklist into an intelligent, self-driving workflow, and it’s a core strength of the Fluidwave platform.
We've all seen where manual handoffs go wrong. Someone finishes their part, but forgets to ping the next person in line. The project stalls, deadlines slip, and frustration builds. This is exactly the kind of friction that workflow automation is designed to eliminate.
Before you can automate, though, you need a solid base. The process is straightforward: structure your project, define the necessary tasks, and save it as a template for reuse.
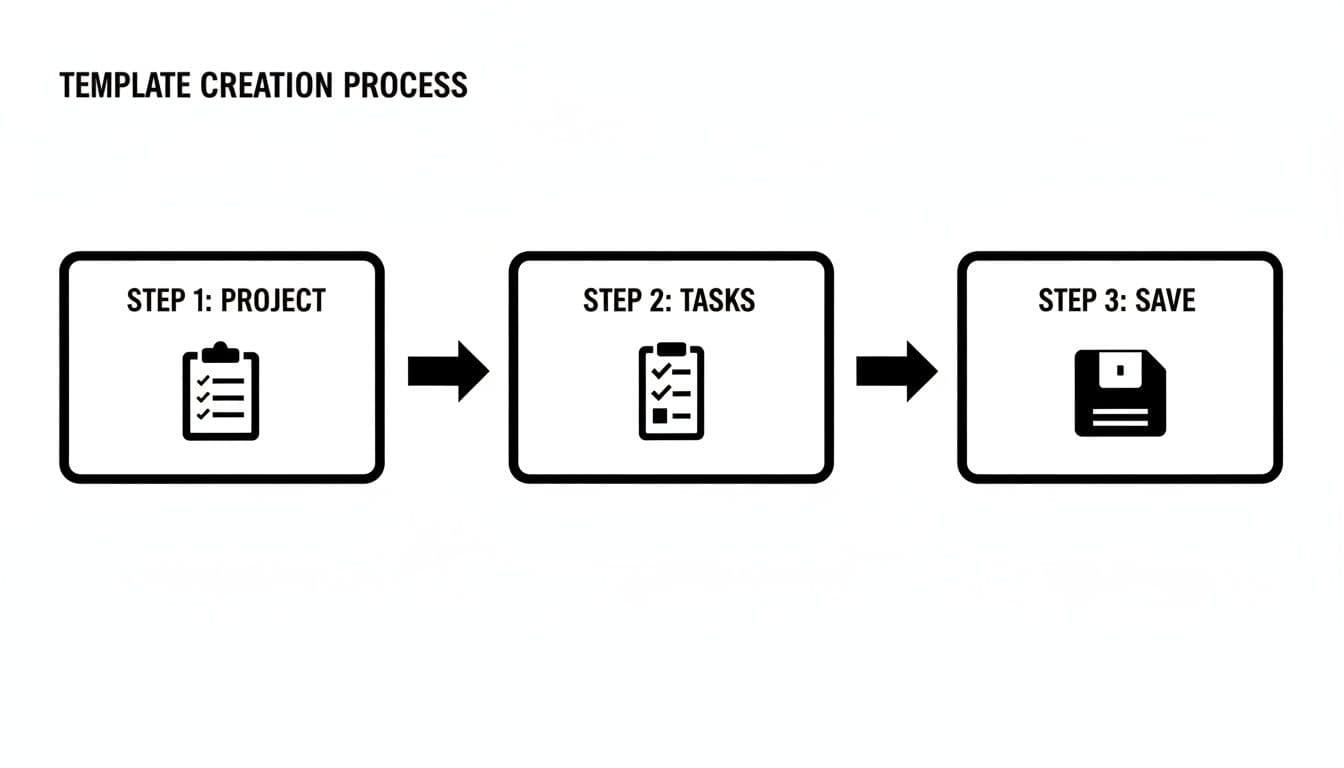
Think of this as building the chassis of a car. It's a crucial first step, but now we get to add the engine.
Set Up Your First Automation Rule
Let's walk through a common scenario: a content production pipeline. You have familiar stages like Writing, Editing, Design, and Publishing. Instead of relying on manual Slack messages or emails to move things along, we can build a simple rule.
For example, you could set up an automation that says, "When a task's status changes to 'Ready for Edit,' then the task is automatically assigned to our lead editor."
You can then chain these rules together to manage the entire workflow, from first draft to final publication, with zero manual intervention. Every rule you build in Fluidwave has three core components:
- Trigger: This is the event that starts the automation. It could be anything from a task being marked complete to a due date getting close.
- Condition: This is an optional filter that adds more specific logic. For example, you might want a rule to run only if a task is tagged with High Priority.
- Action: This is what happens when the trigger and conditions are met. It could be assigning a team member, changing a status, or sending a notification.
By setting up these "if-then" recipes, you turn your static template into an active partner that helps drive work forward. For a more in-depth look at building these, our guide on how to automate tasks covers some more advanced strategies.
Build Delegation-Ready Templates
Automation becomes even more powerful when you pair it with Fluidwave’s delegation features. This lets you build templates designed to hand off work to our network of skilled virtual assistants with just one click. This is how you truly start to scale your team's output.
Imagine you’ve just hit 'publish' on a new blog post. The next step is promotion, which involves creating and scheduling a dozen social media posts. That's a perfect task to delegate, but explaining it from scratch every time is a huge time-sink.
A delegation-ready template is a "task-in-a-box." It contains everything a virtual assistant needs to get the job done right the first time—clear instructions, necessary assets, budget, and the definition of 'done.'
This approach mirrors the efficiencies seen across the digital marketing industry, which is projected to hit $786.2 billion by 2026 and runs on repeatable campaign frameworks. By creating a delegation-ready template, you get access to pay-per-task help without the usual friction of hiring and onboarding.
To build an effective delegation template, make sure you pre-define these key elements:
- Task Description: Be incredibly specific. Write it as if the person has zero context for the project.
- Required Skills: Tag the exact skills needed, like 'Graphic Design' or 'Social Media Marketing'.
- Budget: Set a fixed price for completing the task.
- Deliverables: Clearly outline what "done" looks like. For instance, "Three unique social media graphics sized for Twitter, LinkedIn, and Instagram."
With a template like this in your library, you can create a final automation rule: "When a blog post's status changes to 'Published,' then activate the 'Social Media Promotion' delegation template." Just like that, you’ve moved from simply managing work to truly orchestrating it.
Testing and Refining Your Templates Over Time
A template is never really “done.” Your first version is just a hypothesis—your best guess at what will work. The real magic happens when you start using it, gathering feedback, and fine-tuning it over time. Think of your templates as living documents; their ability to evolve is what makes them so powerful.
Now comes the important part. Don’t just admire your new template on a screen—put it to work on a live project. This is the only way to find the hidden snags, the confusing instructions, or the automation rules that just don't fire the way you expected.
Running a Real-World Test
The goal of this first run-through is to find the friction. Where do things get clunky or slow down? Pay very close attention to any point in the process where someone has to stop what they're doing and ask a question.
Here's a practical checklist I use to guide that first test:
- Task Clarity: Can someone with zero context instantly understand what a task title and description mean? If not, it’s not clear enough.
- Logical Flow: Are the task dependencies actually helping, or are they blocking people unnecessarily?
- Time Budgeting: Is a specific task always taking way longer than the time you budgeted? This is a huge red flag.
- Automation Glitches: Did every single automation trigger correctly? For example, did a task actually re-assign to the next person after being marked complete?
- Instructional Gaps: Are people constantly asking how to complete a certain step? The instructions might be missing something critical.
Every question a team member asks about a template is a gift. It's a bright, flashing sign pointing directly to an area that needs improvement. Don’t see it as a failure of the user; see it as a failure of the template’s design.
Answering these questions honestly will shine a spotlight on the weak points in your initial design. For instance, if you see that the "Gather Project Assets" task is always late, it probably means the instructions are too vague or you haven't given the assignee enough specific detail to work with.
Gathering Feedback and Iterating
After you’ve run the template through its paces, the next step is getting honest feedback from the team who used it. This can be tricky. People are often hesitant to criticize something you've built, so you need to make it easy and safe for them.
Forget asking generic questions like, "What do you think of the new template?" You’ll get generic answers. Instead, try asking more specific, open-ended questions that dig for real insights.
Consider prompts like these to get the conversation started:
- What was the single most confusing part of this entire workflow?
- If you could delete one task from this template to make it better, which one would it be and why?
- Where did you feel like you were just wasting your time?
The answers you get are your roadmap for version two. Maybe a big task needs to be broken down into smaller subtasks, or perhaps a due date consistently needs a bigger buffer. These small, iterative tweaks are what transform a good template into an indispensable tool that evolves with your business, making the process of how to make a template an ongoing cycle of improvement.
Common Questions About Making Templates
As teams start building their first templates, the same few questions always seem to surface. Getting ahead of these common hurdles is the fastest way to build workflows that are genuinely useful and don't create more friction than they solve.
Let's walk through some of the things people often ask when they're getting started with templates in Fluidwave.
How Do I Decide What Needs a Template?
This one's easy. I always tell people to follow the "Rule of Three." If you find yourself doing the same multi-step process for the third time, that's your cue. It’s time to build a template.
This isn't about automating every tiny thing you do. It's about spotting the recurring, structured work before it eats up your team's bandwidth. A process doesn't have to be identical every time—just the sequence of steps needs to be predictable.
Think about workflows like:
- Weekly financial reporting
- New client onboarding
- Monthly content calendar planning
- Tracking and resolving software bugs
Any process with a clear path from start to finish is a prime candidate. The template handles the structure, freeing your team to focus on the unique details of the task at hand. It’s less about saving clicks and more about saving mental energy and guaranteeing consistency.
Can I Make My Templates More Accessible?
Not only can you, but you absolutely should. Accessibility is often an afterthought, but it's crucial for building inclusive and effective workflows—especially for team members with ADHD or other forms of neurodivergence. The goal is to design for clarity and reduce cognitive load.
For a template that truly works for everyone, focus on these details:
- Use plain, simple language. Ditch the jargon in task names and descriptions.
- Break down big tasks. A giant, intimidating task is a recipe for procrastination. Turn it into smaller, manageable subtasks.
- Add checklists. They give people a visual sense of progress and a satisfying little dopamine hit with every box they tick.
- Set realistic deadlines and priorities. Clearly signal what needs attention first to help people focus their efforts.
A consistent, predictable structure lowers the mental barrier to getting started. It reduces anxiety and makes it easier for everyone on the team to drop into a state of flow.
How Specific Should Instructions Be for Delegated Tasks?
When you’re building a template for tasks you plan to delegate, there's no such thing as too much detail. You have to write the instructions as if the person picking it up has zero context. Seriously.
One of the biggest mistakes I see is a vague task like, "Find images for the blog post." That’s an invitation for endless back-and-forth questions.
A much better approach is to be crystal clear. Try this instead: "Find 3-5 royalty-free, landscape-orientation images related to [Topic]. They need to be high-resolution (at least 1920px wide) and fit our brand style, which you can find here: [link to brand style guide]."
For any task you hand off, your instructions should spell out:
- The Desired Outcome: What does "done" actually look like?
- All Necessary Resources: Link directly to any documents, tools, or examples needed.
- Key Constraints: Be explicit about budgets, deadlines, and any hard-and-fast rules.
Getting this specific from the start is the secret to effective delegation. It’s how you get the work done right the first time, without it boomeranging back to you.
Ready to stop reinventing the wheel and start scaling your team's output? With Fluidwave, you can build intelligent, automated templates that not only organize work but help you delegate it confidently with a single click. Get started with Fluidwave for free and reclaim your time.
Focus on What Matters.
Experience lightning-fast task management with AI-powered workflows. Our automation helps busy professionals save 4+ hours weekly.